On March 6 my colleague Dennis and I ministered a session at the Dutch VMUG Conference. You can find the slide deck here: Datacenter_Schoenendoos_Spindle-vs-flash. During this session we presented our shoebox size datacenter which we had with us and showed on stage.
A lot of people walked up to the stage before and after the session to have a look and the bunch of coolness that was showed. We also got a lot of questions about the actual hardware we used. So in this post I will give an overview. I will dive into the software we used and the actual performance in another blog.
Before I start talking about the hardware let me take this opportunity to thank the NLVMUG Customer council for organizing a great event. Unfortunately I missed the first part of the conference but I really enjoyed the afternoon. Great venue, interesting sponsors and a lot of visitors. Well done!
The Server Hardware
The mainboards we use are Intel NUC boards. These are 10cm x 10cm boards intended for desktop or mediacenter use. However, these boards are used as an ESXi server in many homelabs. The major flaw when using these boards as an ESXi server is the lack of NICs. Lucky for us Intel released a new version of their board in the last quarter of 2013. This board includes a regular SATA connector alongside the mSATA connector. This means we can connect a regular SSD and use the mSATA/mini PCIe slot for a mini PCIe network adapter.
The CPU on our board is a Haswell generation Dualcore i5. This gives a good amount of CPU power but I would love to see a qudcore version. The CPU is soldered to the board so there is no way of swapping the CPU for another one. A little word of warning when you’re selecting RAM for this board: It only takes DDR3L RAM. This 1.35volt RAM, not the regular 1.5volt RAM you may have laying around.
Here is the kit list per server:
- Mainboard: Intel D54250WYB (available here: hardware.nl)
- RAM: KingstonKVR16LS11/8 (DDR3L SO-DIMMS) (available here: hardware.nl)
- NIC: Jetway 2x 10/100/1000 LAN Mini PCIe module (available at logicsupply)
- SSD: Intel DC S3700 100GB version (hardware.nl)
- Power supply: 19.5v 90W brick (also from logicsupply)
The Rack
All the hardware needed a place to live. We could have just bought a NUC case from Intel or another vendor and stack them ontop of each other. I did even find a case that would house the SSD. But what about the additional NICs? We couldn’t find anything that suited our needs so we decided to build our own “case”. Using a 3D printer seemed both the most practical and coolest way to build our NUC case, or rather rack.
I never used a 3D printer or a 3D design application before, but it turned out to be way easier then I expected. However, we couldn’t have done this without the help of our friends over at hackerspace Randomdata. So a big thank you to Randomdata for letting us use their Ultimaker 3d printer and for all the effort they put into printing all the parts.
Here are the links to the tinkercad projects:
I had to cut two notches out of each board to make them actually fit in the rack. Obviously a measurement error from me but this does prevent them from sliding out. So if you decide to print your own you could make the baseplate and supports half a millimeter wider or put a dremel to your board just like I did 🙂
Here is a picture of one completed module on its baseplate.
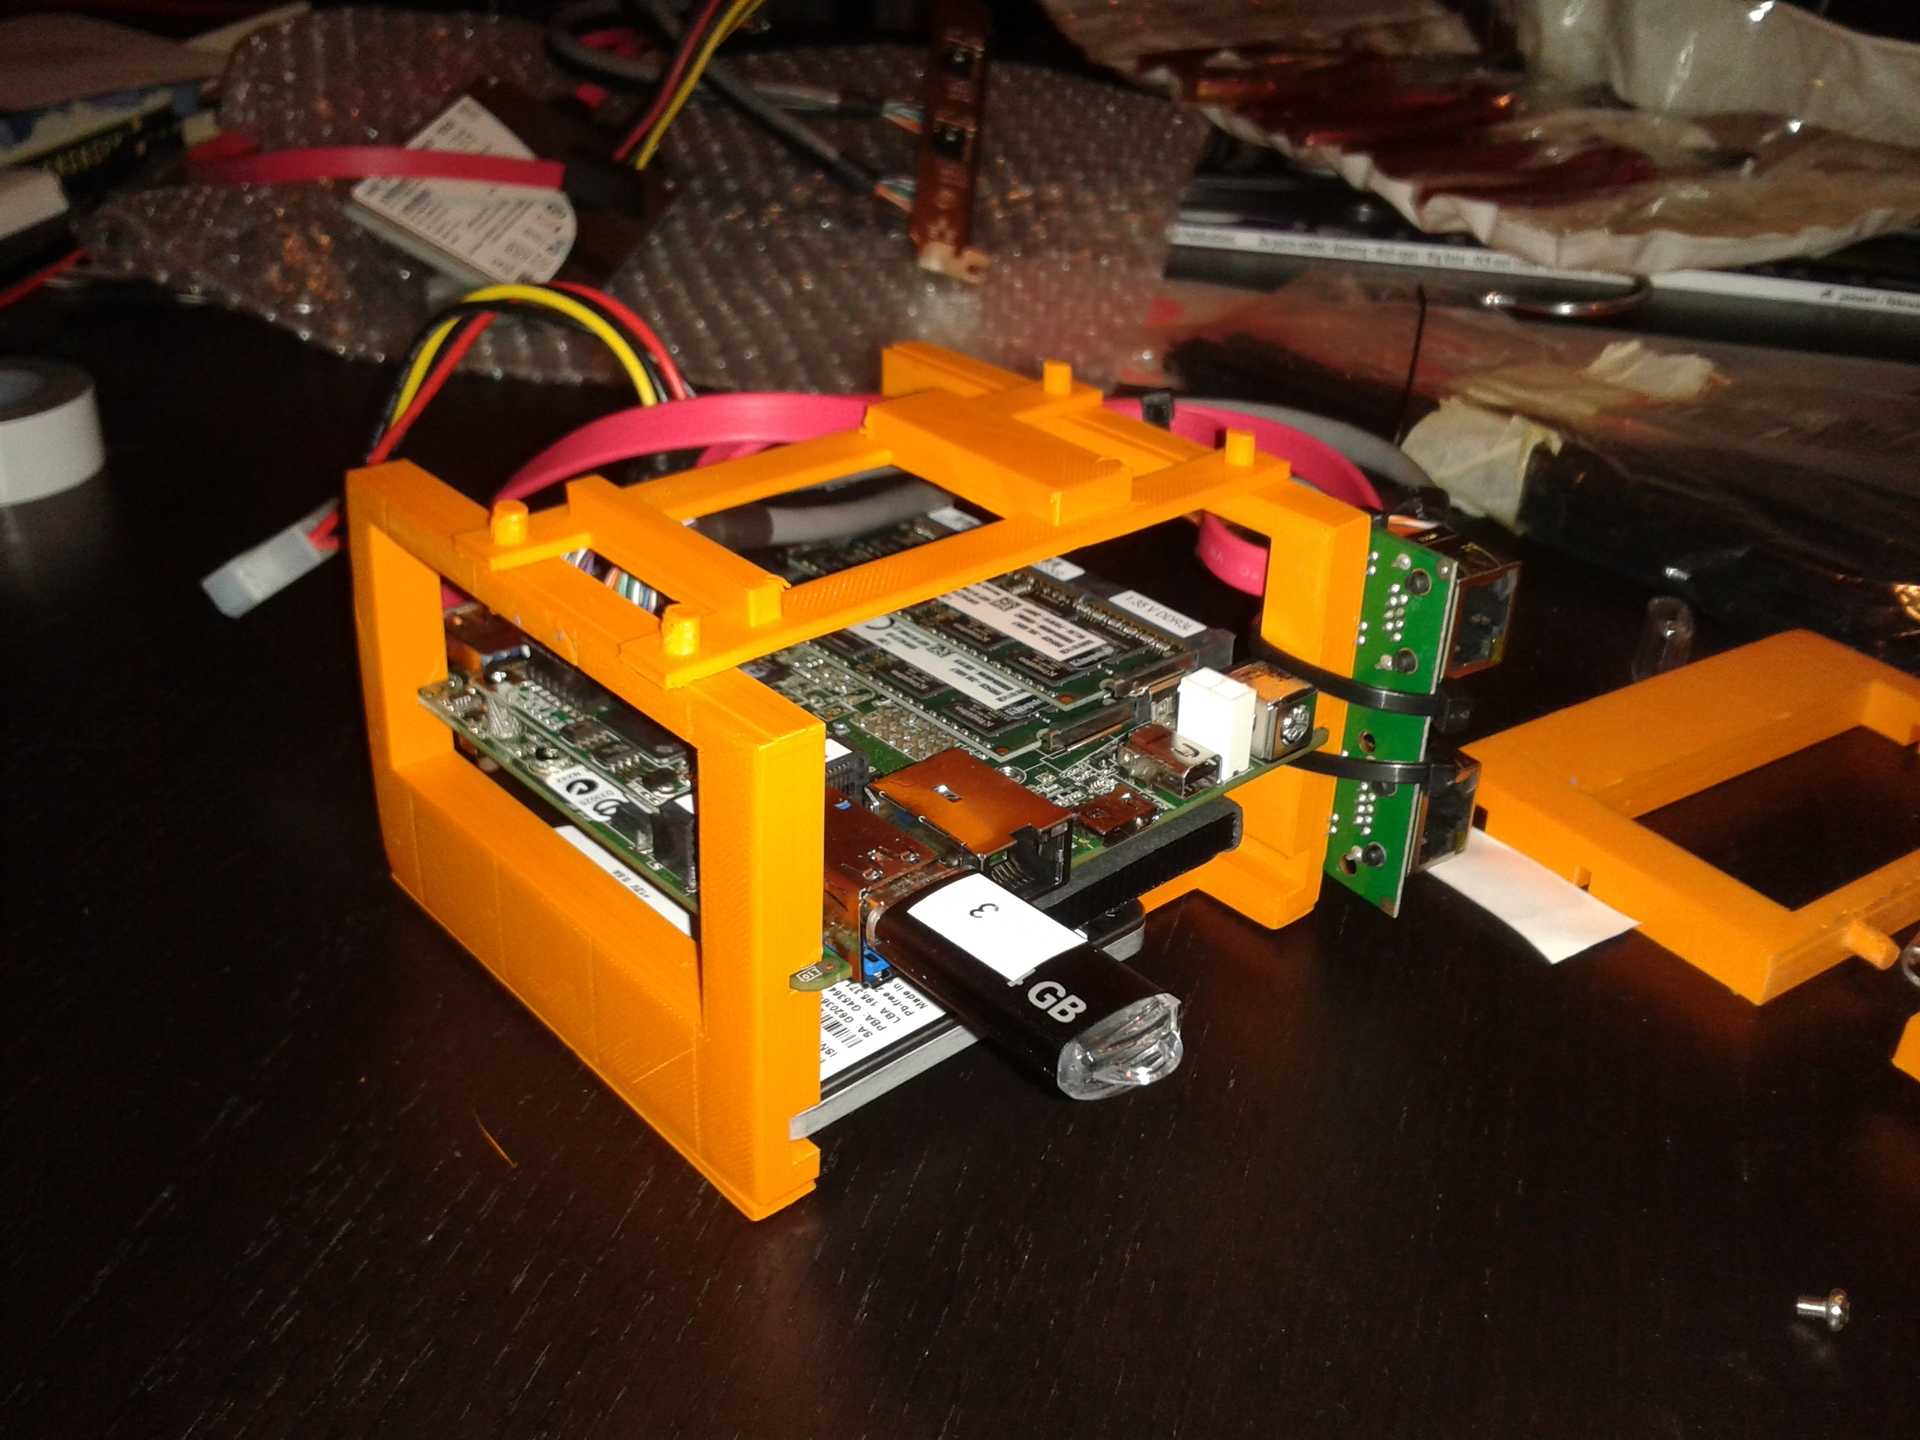
There are holes in the bottom of the sides so the modules are stackable. This is how it looks like once we scaled out to three modules:

If you decided to build your own NUC rack: Happy building. If you come up with any changes or additions please share them so we can all enjoy it!